Swift iOS – how to save UIColor in UserDefsults

Add the following extensions:

extension Numeric {
    var data: Data {
        var bytes = self
        return Data(bytes: &bytes, count: MemoryLayout<Self>.size)
    }
}
extension Data {
    func object<T>() -> T { withUnsafeBytes{$0.load(as: T.self)} }
    var color: UIColor { .init(data: self) }
}
extension UIColor {
    convenience init(data: Data) {
        let size = MemoryLayout<CGFloat>.size
        self.init(red:   data.subdata(in: size*0..<size*1).object(),
                  green: data.subdata(in: size*1..<size*2).object(),
                  blue:  data.subdata(in: size*2..<size*3).object(),
                  alpha: data.subdata(in: size*3..<size*4).object())
    }
    var rgba: (red: CGFloat, green: CGFloat, blue: CGFloat, alpha: CGFloat)? {
        var (red, green, blue, alpha): (CGFloat, CGFloat, CGFloat, CGFloat) = (0, 0, 0, 0)
        return getRed(&red, green: &green, blue: &blue, alpha: &alpha) ?
        (red, green, blue, alpha) : nil
    }
    var data: Data? {
        guard let rgba = rgba else { return nil }
        return rgba.red.data + rgba.green.data + rgba.blue.data + rgba.alpha.data
    }
}
extension UserDefaults {
    func set(_ color: UIColor?, forKey defaultName: String) {
        guard let data = color?.data else {
            removeObject(forKey: defaultName)
            return
        }
        set(data, forKey: defaultName)
    }
    func color(forKey defaultName: String) -> UIColor? {
        data(forKey: defaultName)?.color
    }
}
extension UserDefaults {
    var backgroundColor: UIColor? {
        get { color(forKey: "backgroundColor") }
        set { set(newValue, forKey: "backgroundColor") }
    }
}

Usage

Set:

let defaults = UserDefaults.standard
defaults.backgroundColor = UIColor.systemOrange

Get (with default incase error):

let defaults = UserDefaults.standard
myView.backgroundColor = defaults.backgroundColor ?? UIColor.systemTeal

(Optional) Check if exists, else set:

let defaults = UserDefaults.standard
if let col = defaults.object(forKey: "backgroundColor") {
    //Color exists in UserDefaults
    myView.backgroundColor = defaults.backgroundColor ?? UIColor.systemTeal
}else{
    //Color NOT exists in UserDefaults
    defaults.backgroundColor = UIColor.systemOrange
}

Swift – how to take a substring from another string (simple method)

Method:

func getSubstring(inputString: String, start: Int, end: Int) -> String{

    if(start >= inputString.count || end > inputString.count){
        return "ERROR"
    }

    let start = inputString.index(inputString.startIndex, offsetBy: start)
    let end = inputString.index(inputString.startIndex, offsetBy: end)
    let range = start..<end

    let mySubstring = inputString[range]

    return String(mySubstring)
}

Usage:

 
        getSubstring(inputString: "String to search"
                     ,start: <START INDEX>
                     ,end: <END INDEX>)
        

Example:

    let fileName = "20211112_data_file.sqlite"

    let year = getSubstring(inputString: fileName, start: 0, end: 4)
    let month = getSubstring(inputString: fileName, start: 4, end: 6)
    let day = getSubstring(inputString: fileName, start: 6, end: 8)

    let date = day+"/"+month+"/"+year

    print(date)

Outpout:

    12/11/2021

Mac OSX – Stop OS X apache service and prevent automatic running (OS X SERVER)

I already run MAMP as a local server environment for apache and MySQL, so when I installed Mac OS X Server, which runs it’s own instance of apache, my server encountered problems with MAMP which failed to start.

After some investigation I found the OS X Server instance of Apache started with the system resulting in MAMP failing to start, with no obvious setting to disable the in-built apache services in the OS X Server app settings.

Here’s how to prevent the service starting automatically, then kill the existing service:

Step 1: Locate the following file: /Library/Server/Web/Config/Proxy/apache_serviceproxy.conf

Step 2: Comment out the listening ports in the file

Example using standard ports, change:
Listen 80
Listen 443

To:
# Listen 80
# Listen 443

This prevents apache from starting.

Step 3: Stop inbuilt apache server. Open Terminal, type: sudo killall httpd

Type the following to check http instance have stopped: ps -Al | grep httpd

Inbuilt apache service should now stop and won’t re-start.

Windows – How to free disk space by deleting previous Window(s) installations

Step 1: Click on the Windows search bar or press the start key on your keyboard, type cleanup, then select Disk Cleanup.

Step 2: Click ‘Clean up System file’

Step 3: Scroll to, and select, Previous Windows Installations. Click start to begin the cleanup process which will include the removal of previous Windows installations from your disk.

This freed almost 30Gb on my disk. This, of course, means you’re unable to revert back to your previous Windows installation so proceed with that in mind. I found the disk space more valuable than holding on to the files.

Mac OSX – How To Connect To A Remote Mac Using Apple Screen Sharing, For Free!

This article describes how to remote view another Mac using Apple Screen Sharing. There is no need to run any third party software as it can all be done using apple’s built in Screen Sharing services, for free! I’m using OS X EL Capitan, Version 10.11.13.

There is just one catch; both devices must use the same iCloud account. If you’re looking to connect to a Mac using different iCloud account then VNC is a good option. For now, I’ll concentrate on connecting to another Mac logged in with the same iCloud account.

Step 1: Open System Preferences on the Mac you plan to connect to from another device. click the Apple icon in the top-right bar, then select System Preferences

Step 2: Click the Sharing icon.

Step 3: Tick Screen Sharing in the Service list

Step 4 (Optional): That’s all the configuration required to access you Mac remotely if on the same WLAN/LAN. The following step is required if you plan to connect to your Mac from a separate network. Head back to System preferences then select iCloud.

Tick Back To My Mac.

<img src=

Step 5: Head over to your other Mac device and open Finder. You should now see your remote Mac’s name under Shared devices. Click your device, then click Share Screen

NOTE: If your remote Mac doesn’t appear in your Shared list, you may need to re-start Finder to scan for your device. (Apple Menu —> Force Quit… —> Select Finder and hit Relaunch)

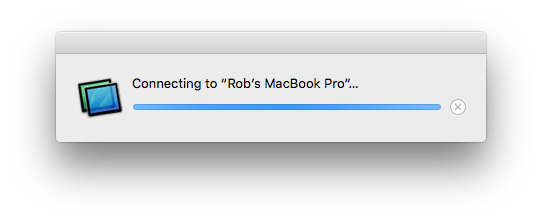
The Share Screen button will Launch Apple’s built in Screen Sharing app allowing you to view and control your remote Mac.

You can right-click the Screen Sharing app icon from the dock while the app is running, then click Options, then Keep In Dock. This makes it easier to find the app in future. When the app is closed you can you can now right-click the app icon from the dock, then select your remote Mac to quickly connect.


SQL – How To Return Ref of Inserted Row

It is extremely useful to return the URN, or any other field, of a newly inserted row for a given table in a single query. The OUTPUT clause makes this possible.

insert into MY_TABLE (Field_1, Field_2, Field_3)
OUTPUT Inerted.REF
values (‘Foo’,’Bar’,’Example’)

The above example returns the REF field, which contains auto-incremented urn in MY_TABLE.